


Canva Drag N Drop Frames With Outlines Tutorial
Posted by Amanda on May 15th 2024
Canva Drag N Drop frames make projects so much easier! They're extremely easy to use - just open the template in Canva and drop any image you want to use in for a background. They can be a little finicky if the frames have an outline - but it's simple and quick to learn how to use them.
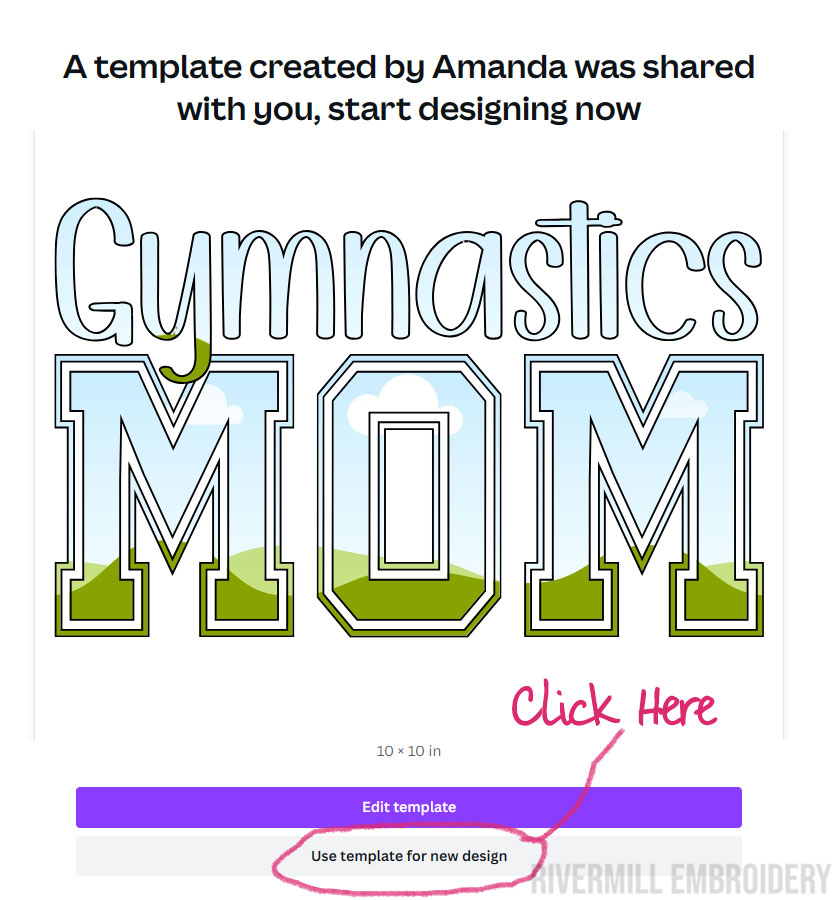
Step 1 - You'll get a PDF download once the order is complete. The PDF will look like the one pictured below and have a link to click. The link will take to you a Canva template with the option to use the template on a new design. Click on that button and it will ask you to open Canva on your computer. Once you allow that, the program will open with your new template.
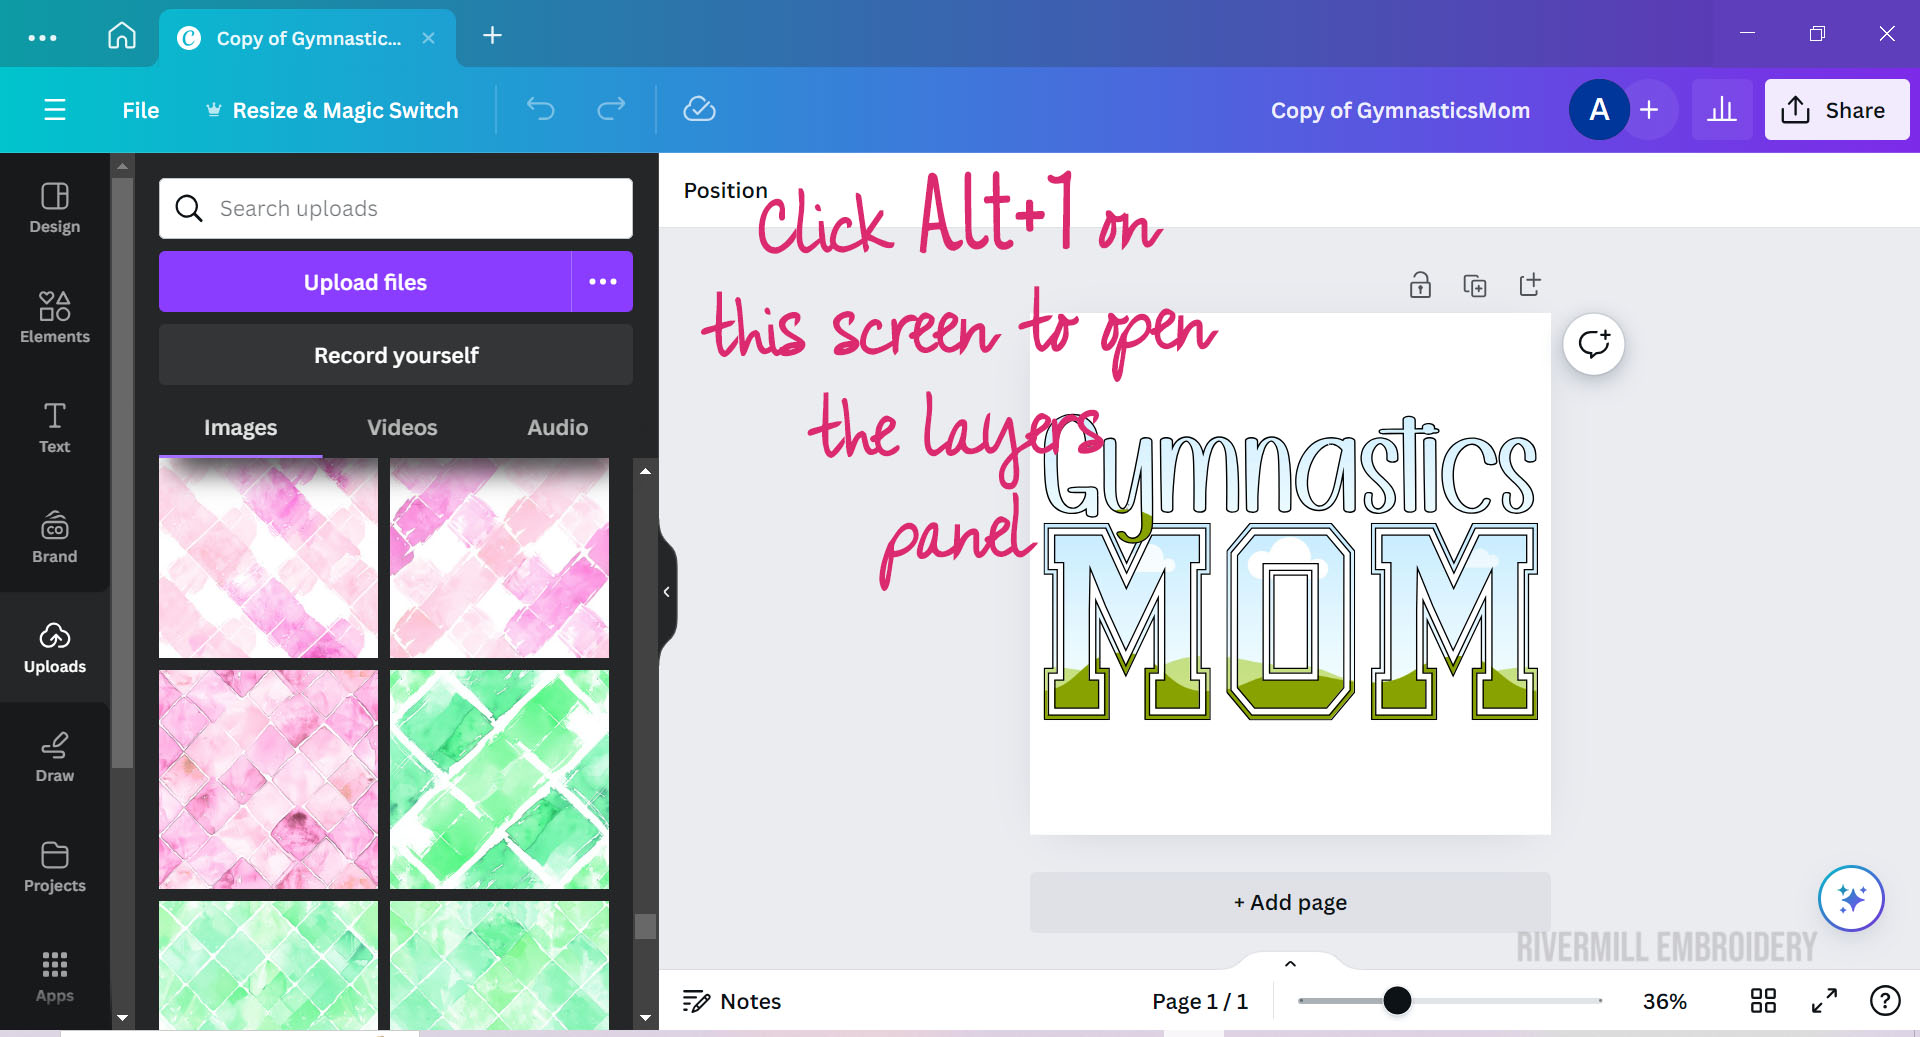
Step 2 - Once Canva is open and your template is loaded, you need to open the layers panel. To do this, use Alt + 1 on your keyboard. Sometimes you have to click once on the background screen and then click on Alt + 1.
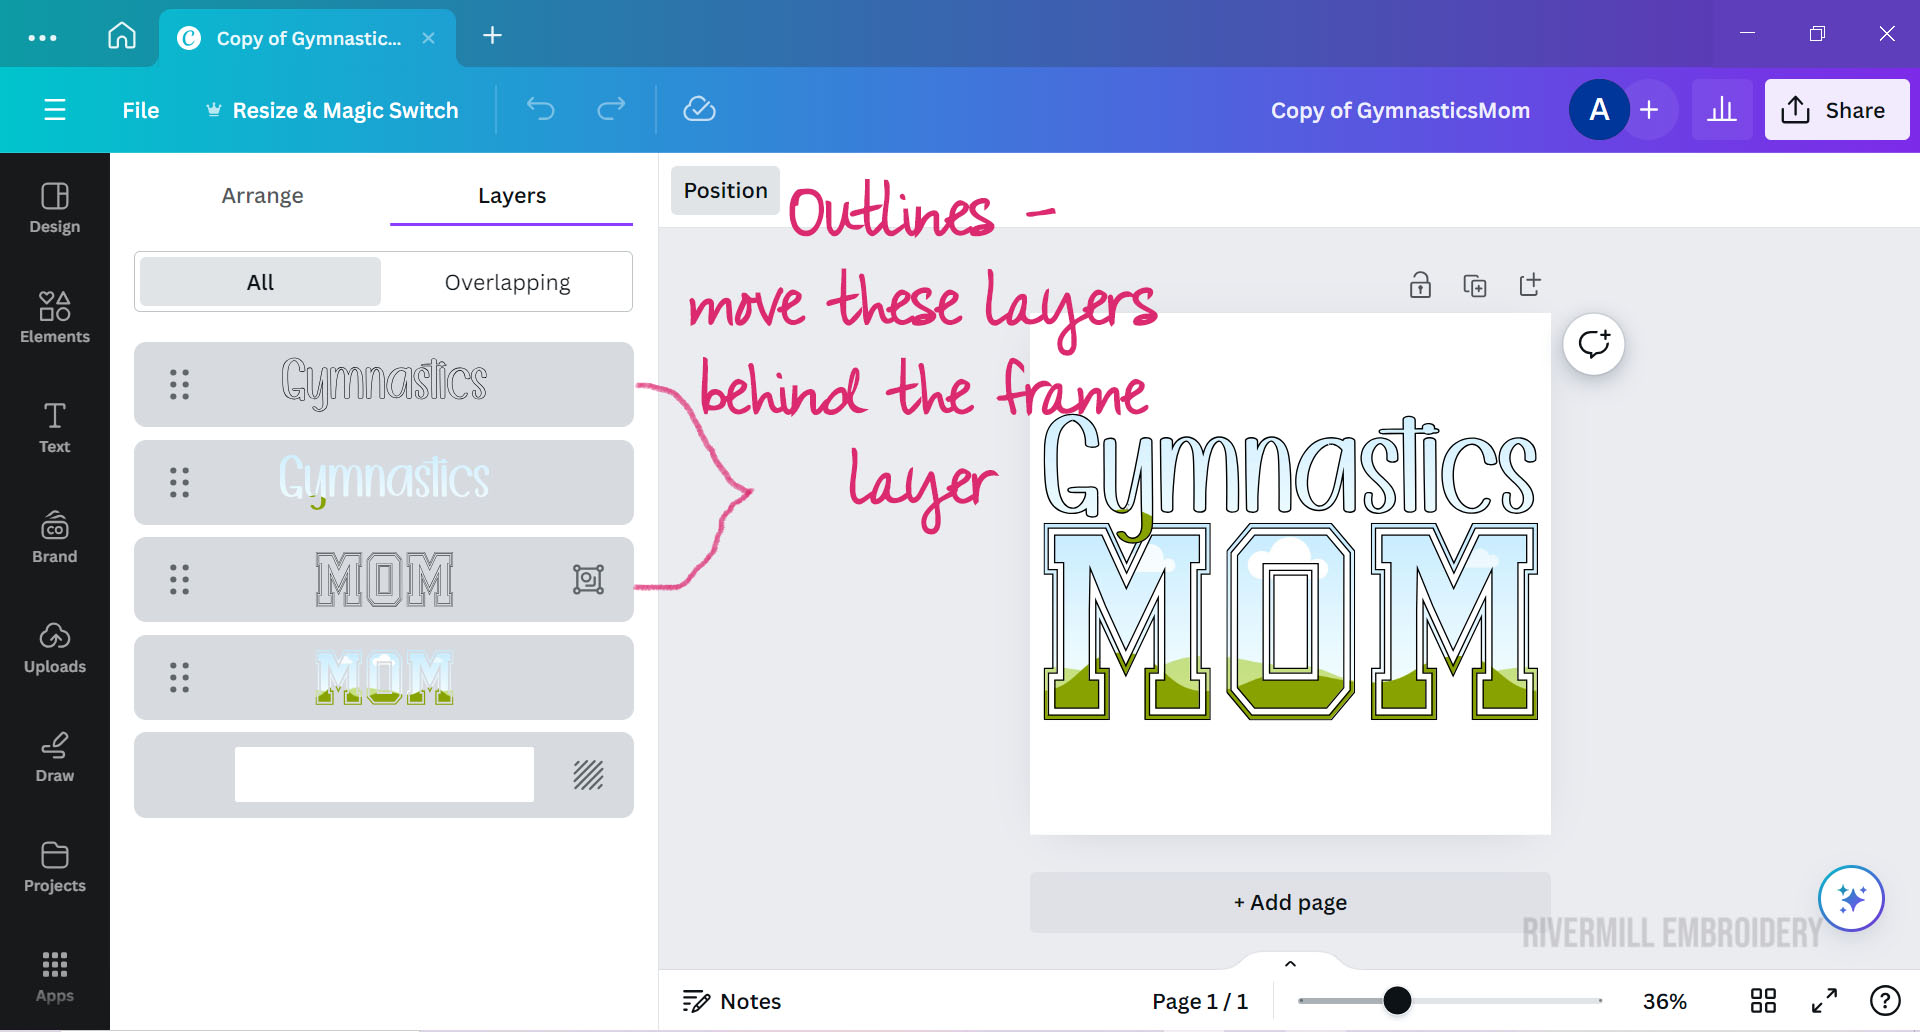
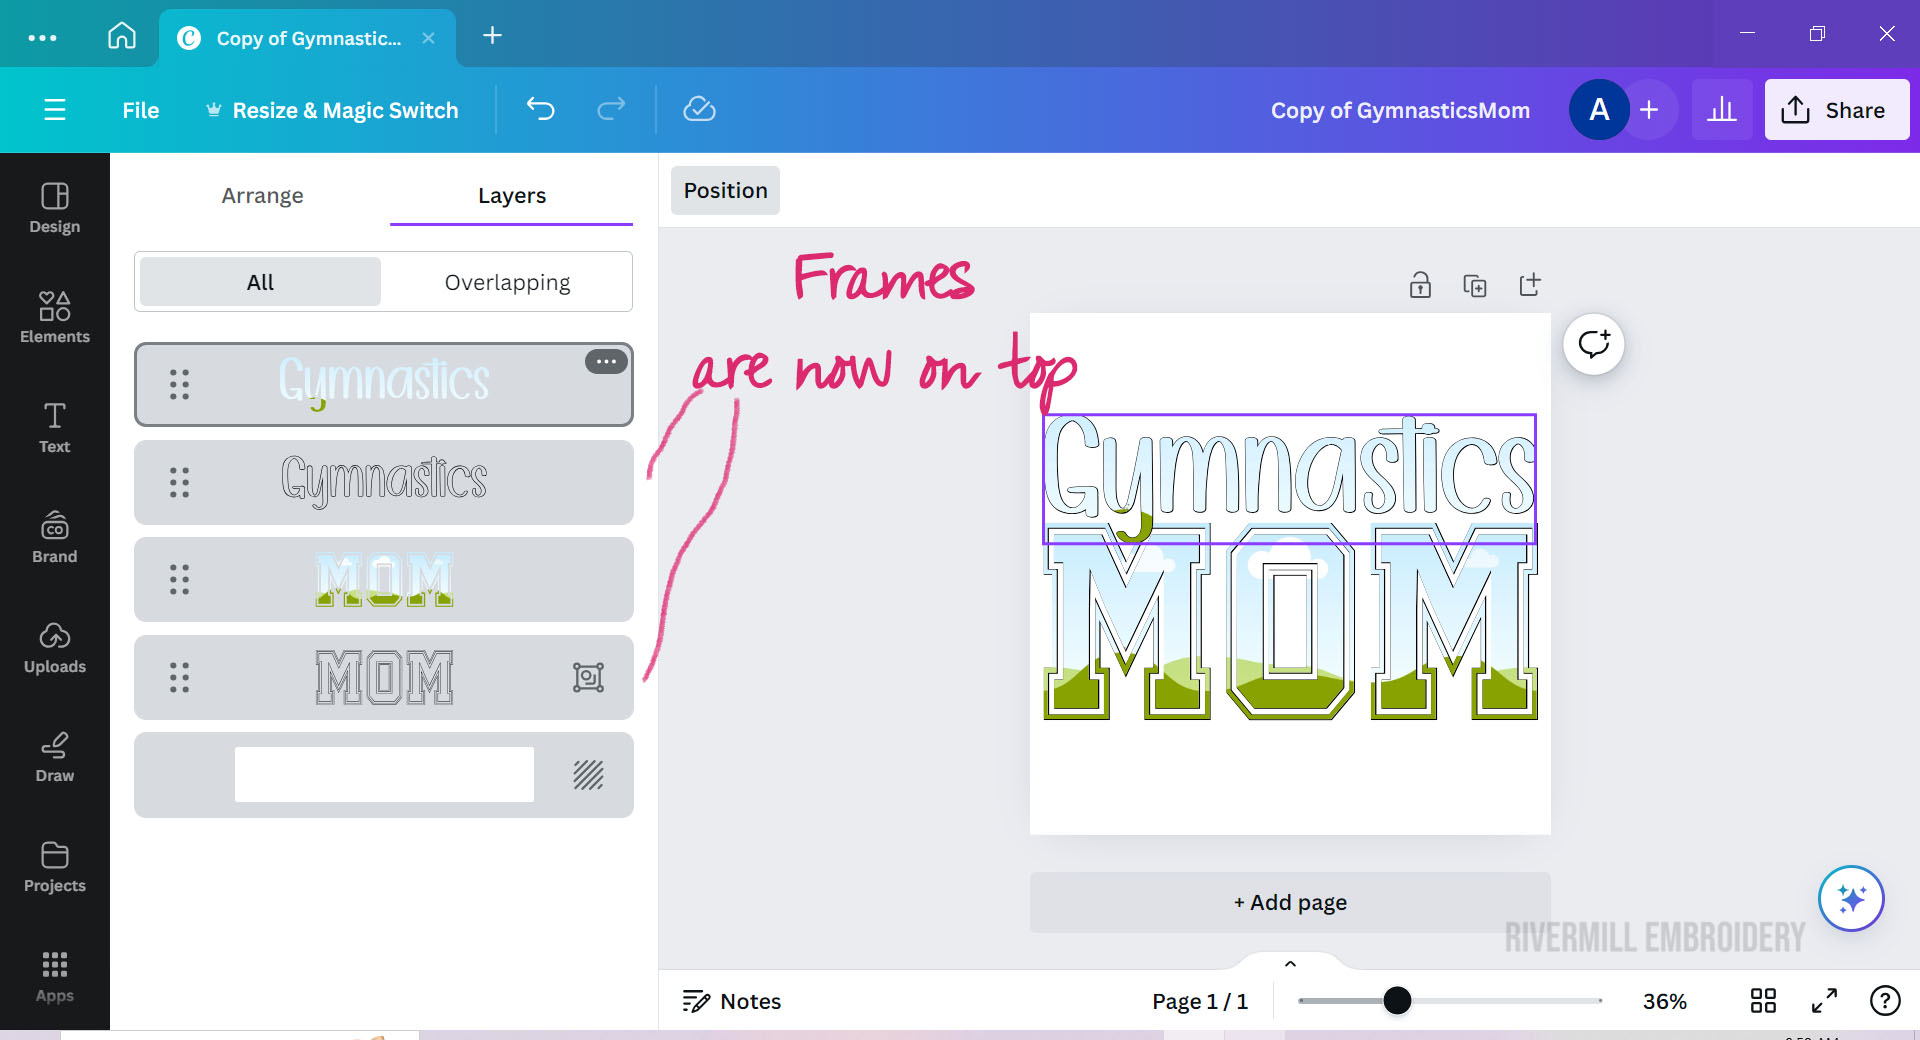
Step 3 - After your layers panel is open - move your outlines so they're below the frames in the list of layers. This will put your frames on top so you can drag and drop your background into them. The screenshot below shows what your layers panel will look like when the outlines are behind the frames.
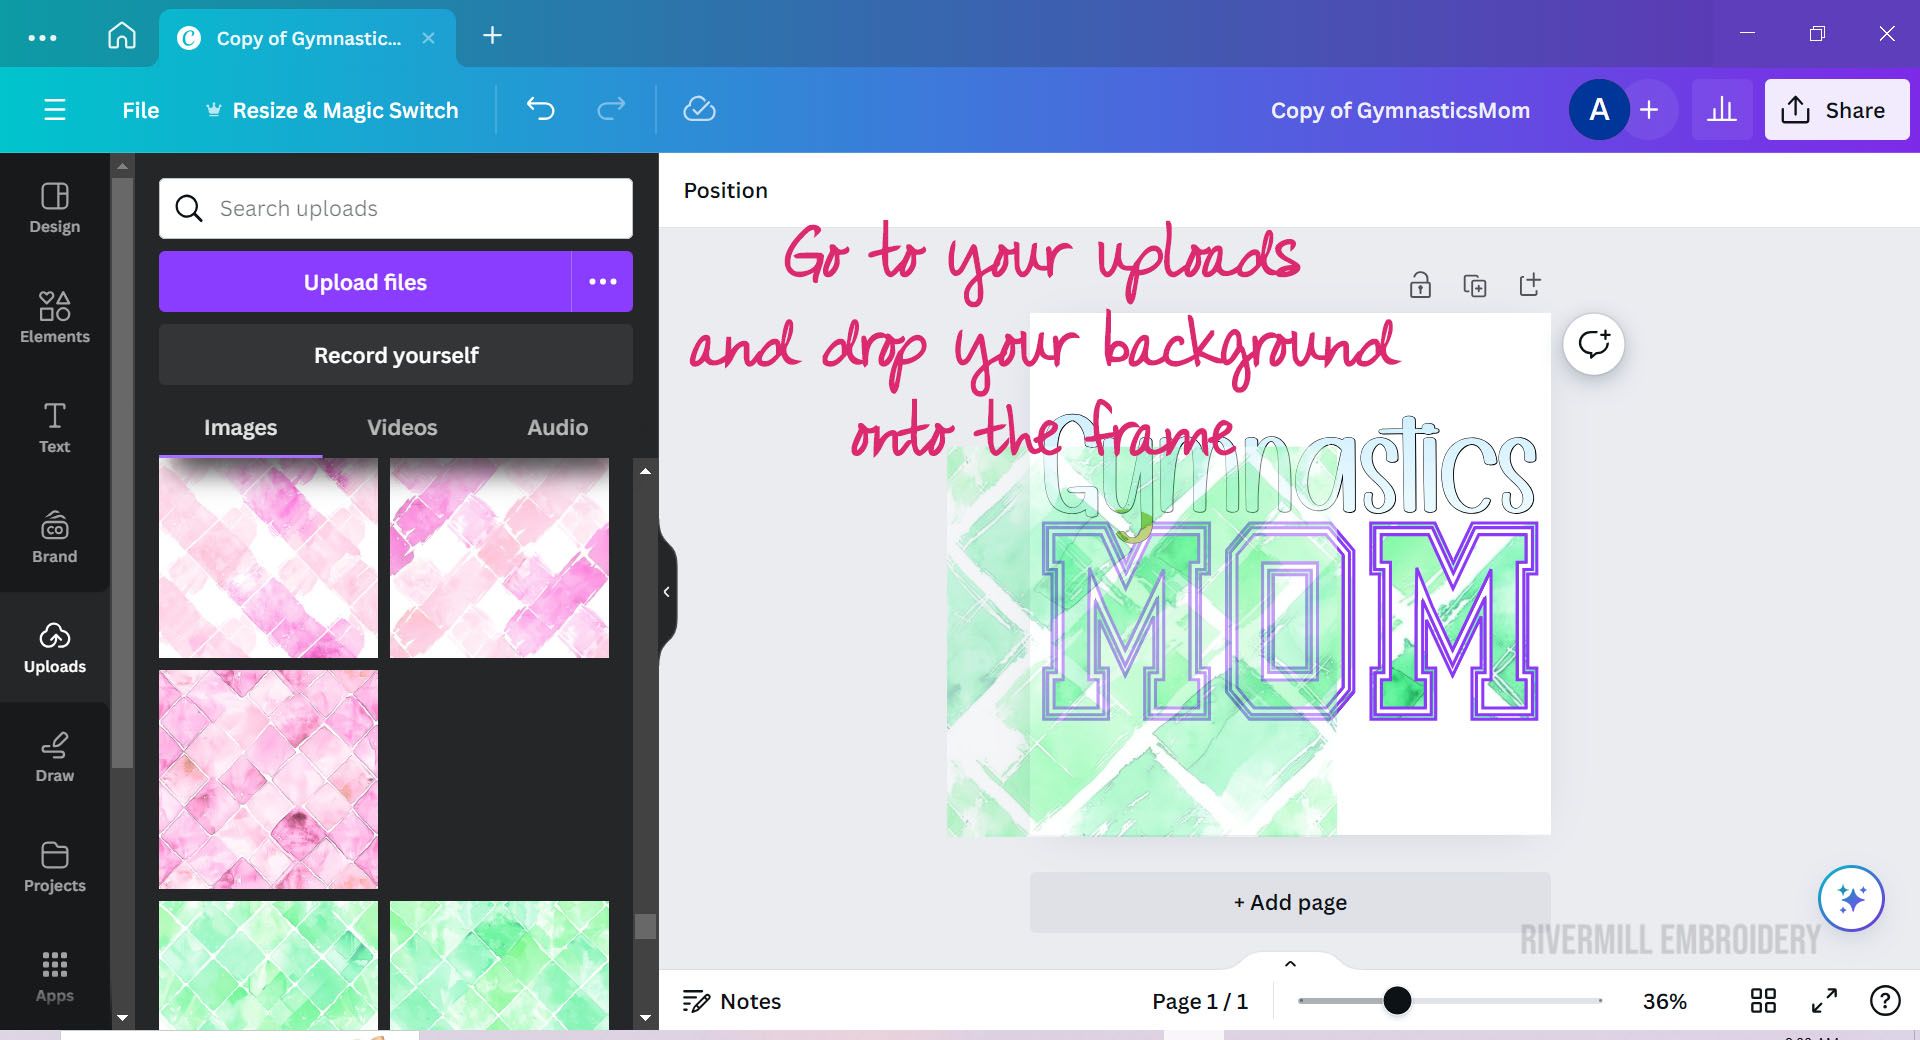
Step 4 - Once that's finished, you can drag and drop your background onto the frames as shown in the screenshot below.
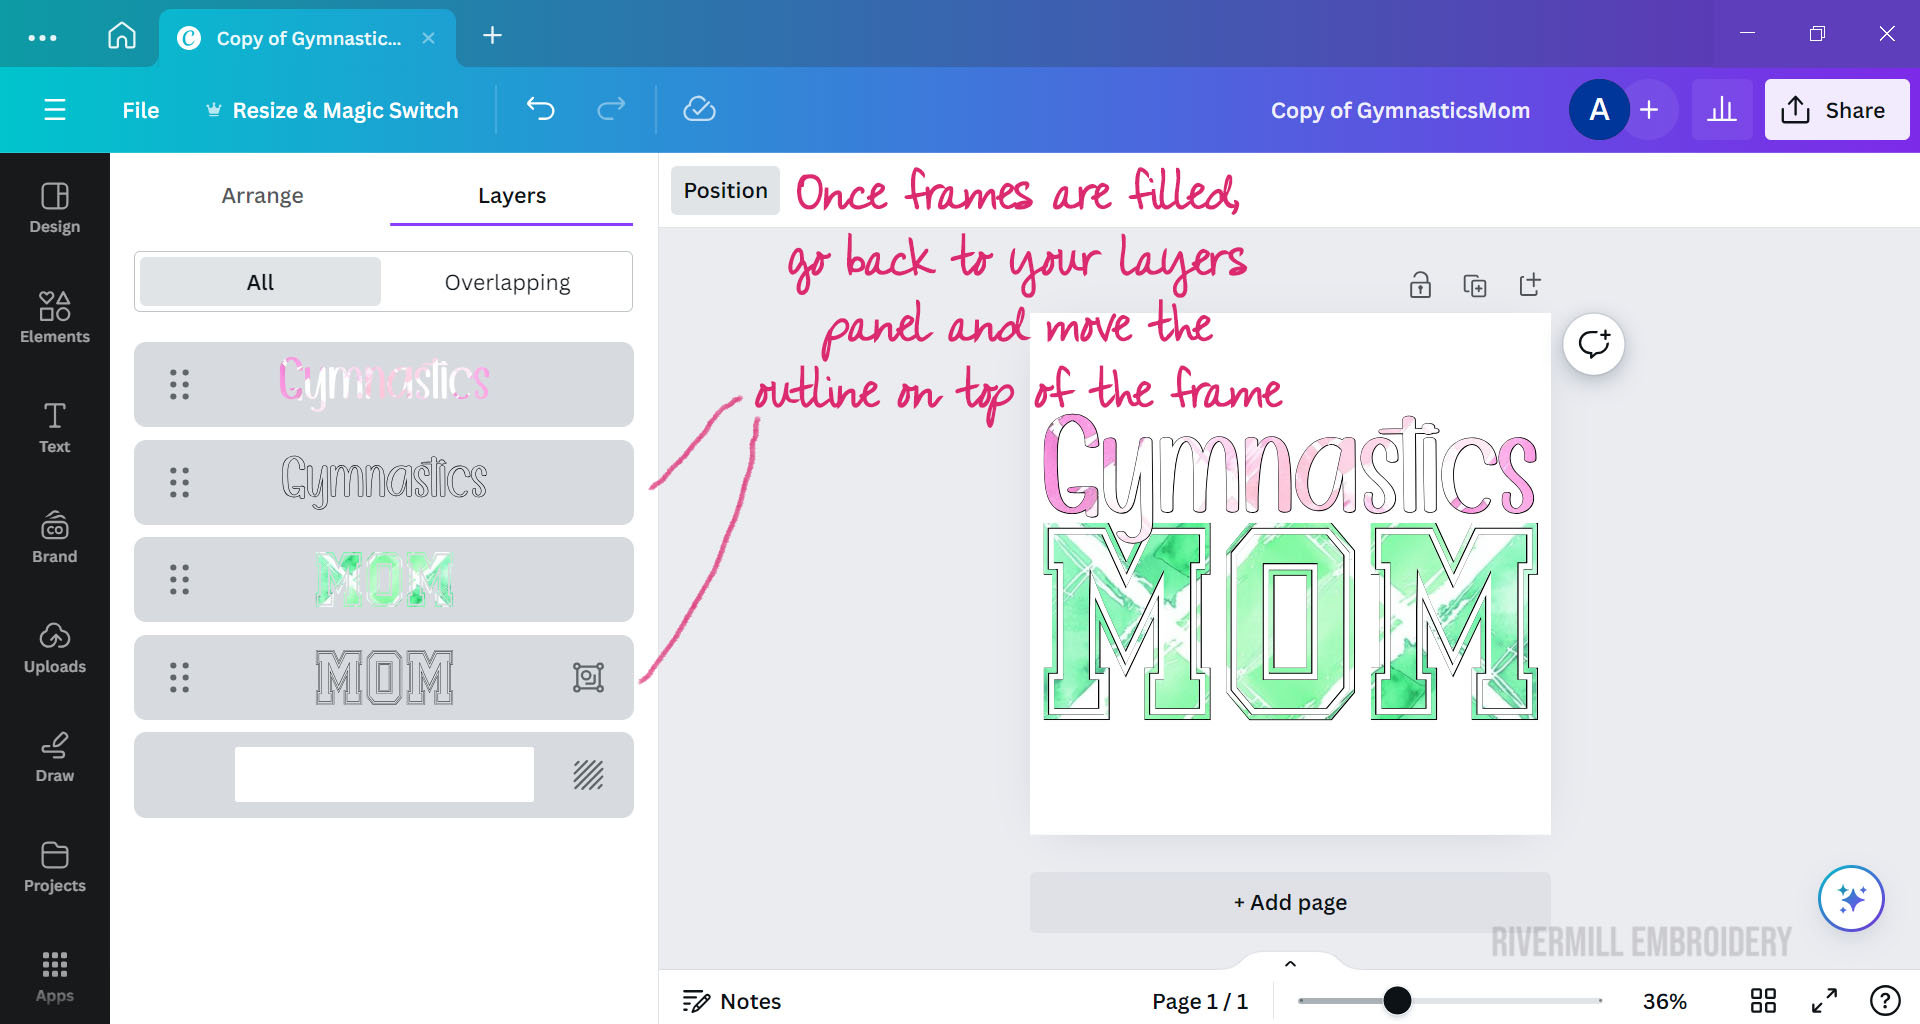
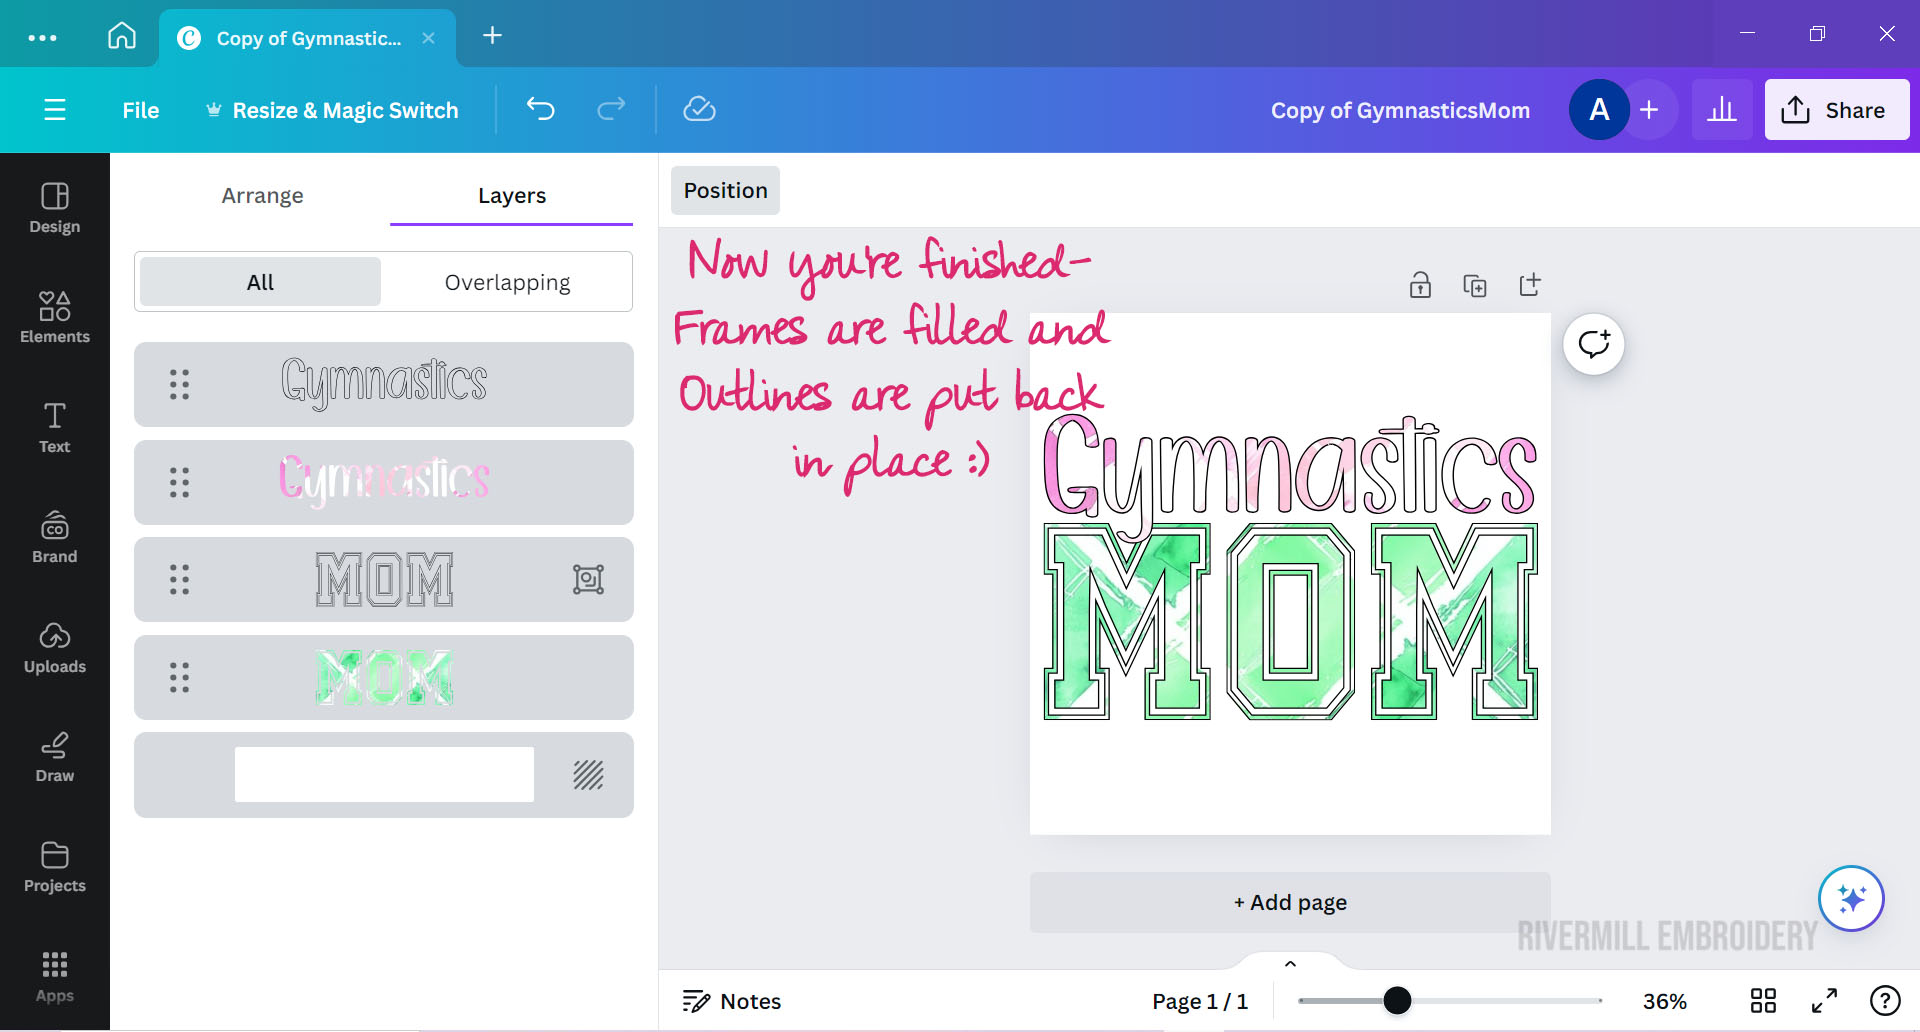
Step 5 - After adding your background to the frames, you just need to move your outlines back on top. To do that, click on Alt +1 again to bring up the layers panel. Then just move the outlines on top of the frames as shown in the screenshots. Once that's done, you're finished filling your frames. :)
If you have any questions please let me know. :) Thanks for reading!